
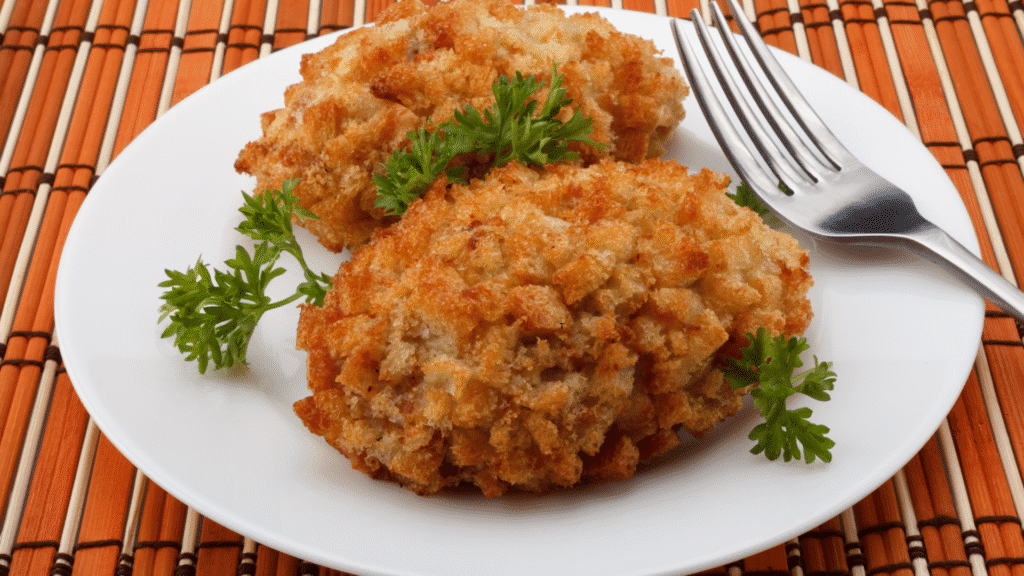
Oven-baked chicken Kiev is a classic dish known for its juicy, herb-butter-filled center and crisp outer coating. Traditionally fried, this baked version keeps the flavor while making the preparation simpler and less greasy.
This article will guide you step-by-step through making chicken Kiev from scratch using your oven. You’ll learn what ingredients to gather, how to shape the perfect chicken roll, and how long to bake it for the best texture.
Table of Contents
ToggleWhat Is Chicken Kiev?
Chicken Kiev is a stuffed chicken breast filled with garlic and herb butter, then breaded and cooked. The origin of the dish is debated, with influences from French and Eastern European cuisines.
The highlight of chicken Kiev is the melted butter that flows out when you cut into it. The oven-baked version offers less mess and fewer calories than deep-frying.
You don’t need any special tools to make this dish. A sharp knife, baking tray, and some plastic wrap will be enough to get started.
Ingredients You’ll Need
Gather these basic ingredients before you start. Fresh herbs and butter are key to getting the right flavor and texture.
- 4 boneless, skinless chicken breasts
- 100g (about 7 tablespoons) unsalted butter, softened
- 2 garlic cloves, finely chopped
- 2 tablespoons fresh parsley, chopped
- 1 tablespoon fresh dill, chopped (optional)
- Salt and pepper to taste
- 1 cup all-purpose flour
- 2 eggs, beaten
- 1½ cups breadcrumbs
- 2 tablespoons vegetable oil (for coating breadcrumbs)
- Plastic wrap and toothpicks or kitchen twine
Optional side ideas:
- Steamed green beans
- Mashed potatoes
- Simple garden salad
How to Make Garlic Herb Butter
Start by making the filling. You can prepare it ahead of time and chill it for easier handling.
Steps to Prepare Herb Butter
- Mix softened butter with garlic, parsley, dill, salt, and pepper in a small bowl.
- Form the mixture into a log shape using plastic wrap.
- Chill it in the fridge for 30 minutes or until firm.
This step helps keep the butter from leaking out during baking.
Prepping the Chicken
Each breast must be flattened and rolled properly to hold the butter inside. This step ensures even cooking and a clean roll.
- Place a chicken breast between two sheets of plastic wrap.
- Use a rolling pin or meat mallet to flatten it to about ½ inch thickness.
- Place a piece of chilled butter in the center.
- Roll the chicken tightly around the butter and fold in the sides.
- Secure with toothpicks or wrap tightly in plastic and chill for another 20 minutes.
Chilling again helps the roll keep its shape during coating and baking.
Coating the Chicken
The coating gives the dish its signature crunch. Use three bowls to set up a basic breading station.
- Dredge each rolled chicken breast in flour.
- Dip into the beaten eggs, making sure it’s well coated.
- Roll in breadcrumbs mixed with a bit of oil for an extra crispy finish.
Make sure the butter is sealed inside to prevent leaks while baking.
Baking Instructions
Baking gives a crisp crust without frying. Preheat the oven before you place the chicken inside.
- Preheat oven to 400°F (200°C).
- Place the breaded chicken on a lined baking tray.
- Bake for 25 to 30 minutes or until golden brown and internal temperature reaches 165°F (74°C).
- Let the chicken rest for 5 minutes before serving.
Resting helps the butter settle inside and keeps the meat juicy.
Serving Suggestions
You can serve chicken Kiev with a variety of simple sides. Since it’s rich and buttery, go for something fresh or starchy.
Popular pairings:
- Roasted vegetables
- Light garden salad
- Rice pilaf or mashed potatoes
Add lemon wedges for a bit of acidity to balance the butter.
Storage and Reheating Tips
If you have leftovers, store them properly to maintain texture and flavor.
- Cool completely before storing.
- Keep in an airtight container in the fridge for up to 3 days.
- Reheat in the oven at 350°F (175°C) for 10–12 minutes.
Avoid microwaving, as it may cause the coating to become soggy.
Common Mistakes to Avoid
Making chicken Kiev for the first time can be tricky. Avoid these mistakes to get better results.
- Don’t skip chilling the butter or the rolled chicken.
- Avoid overcooking, which can dry out the meat.
- Make sure the butter is sealed tightly inside before coating.
- Don’t overcrowd the tray in the oven—space helps it brown evenly.
Focus on timing and assembly, and you’ll have a crisp, juicy dish every time.
Wrapping Up
Oven-baked chicken Kiev is a rewarding dish once you get the steps right. It combines simple ingredients with careful preparation to deliver a crisp, buttery result.
By following this guide, you can create a flavorful meal without needing deep frying. Practice the rolling and chilling steps, and soon you’ll have a go-to recipe that’s both satisfying and straightforward.