

Drawing muscles isn’t just an artistic skill. It’s actually one of the best ways to understand your anatomy courses. Diagrams have a way of making a topic stick with you.
So how do you draw muscles? If you’ve ever looked at a muscle diagram and felt overwhelmed by all the lines, shapes, and overlapping layers, this article is for you.
Let’s get into how to draw muscles accurately.
Step 1: Learn the Bony Landmarks First
Muscles attach to bones, so you can’t accurately draw them without knowing where those bones are.
Start with:
- The scapula, clavicle, and humerus for upper limb muscles.
- The pelvis and femur for the thigh.
- The vertebral column for the back.
Here’s what to do:
- Lightly sketch the skeleton of the area.
- Mark origin and insertion points of key muscles with small dots or light lines.
- Don’t worry about being artistic at this stage. Focus on accuracy.
Once you get the skeleton right, every muscle you draw will be anchored properly.
Step 2: Break Down the Muscle Into Basic Shapes
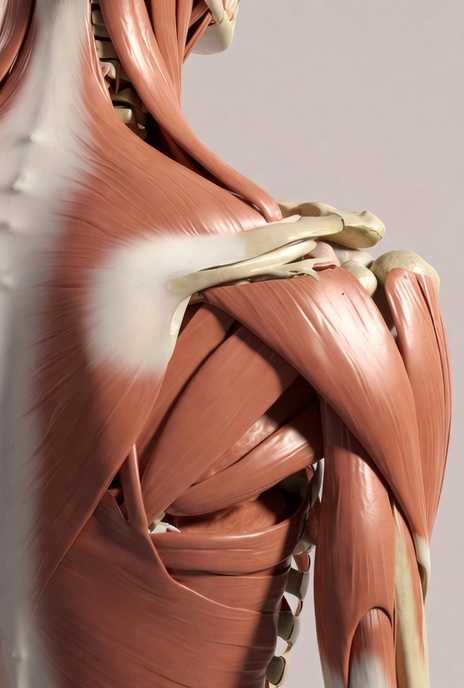
This is where many students struggle. Muscles can seem complex, but they can often be reduced to basic geometric forms like cylinders, ellipses, and fans.
For example:
- The biceps brachii can be drawn as two overlapping cylinders.
- The deltoid resembles a fan or triangle with curved edges.
- The rectus femoris has a fusiform (spindle) shape.
By reducing each muscle to a simple form, you train your brain to recognize patterns. Later, you can refine the shape with more anatomical detail.
Tip: Don’t try to draw every muscle in a region at once. Start with 2 to 3 key muscles, then add more gradually.
Step 3: Observe Fiber Direction and Orientation
Muscle fibers don’t just sit randomly. Their orientation tells you about function and force direction. Always pay attention to:
- Longitudinal fibers (e.g., sartorius)
- Pennate fibers (e.g., rectus femoris)
- Convergent fibers (e.g., pectoralis major)
- Circular fibers (e.g., orbicularis oris)
Draw thin directional lines inside your muscle shapes to represent fibers. This adds functional meaning to your drawing. You’re not just drawing the shape, you’re drawing the movement.
When studying from atlases or cadaver images, trace the fiber direction lightly with a pencil before drawing the full muscle body.
Step 4: Layer the Muscles Correctly
Muscles often overlap, especially in the shoulder, back, and hip regions. To draw accurately, you need to understand which muscles are deep, which are intermediate, and which are superficial.
For instance:
- In the back:
- Superficial: trapezius, latissimus dorsi
- Intermediate: rhomboids, serratus posterior
- Deep: erector spinae group
Use different shades of pencil (light, medium, dark) or line thickness to distinguish layers.
Another trick: draw each layer on tracing paper. Start with the deepest, then overlay the next layer until you build the complete muscular structure.
This helps you visualize how muscles wrap and connect without crowding your drawing.
Step 5: Label With Precision and Purpose
Labeling helps lock the information in your memory. But instead of labeling every tiny detail, prioritize:
- Muscle name
- Origin
- Insertion
- Innervation (if needed)
- Function
You can use a system of lines and annotations around your drawing, or create a side table to avoid clutter.
Label as you draw. Don’t wait until the end. This turns the drawing process into an active learning exercise.
Step 6: Compare With Real Images
Textbooks are helpful, but they often simplify or stylize muscles. To draw muscles with real-world accuracy, compare with:
- Cadaver dissection photos
- MRI or CT scans
- 3D anatomy software like Visible Body or Complete Anatomy
Step 7: Practice, Reflect, and Redraw
Don’t treat your first drawing as final. Drawing is iterative.
Here’s how I recommend practicing:
- Set a goal: e.g., “Today I’ll draw the anterior thigh muscles.”
- Draw from memory first: This reveals what you really know.
- Check against a reference: Correct inaccuracies.
- Redraw it again: Solidify the learning.
Repeat this for different views: anterior, posterior, lateral. Each angle will challenge your understanding in a new way.
Final Thoughts
Drawing muscles accurately helps to reinforce key facts and makes memorization more natural. You don’t need to be a gifted illustrator. You just need a structured, consistent approach.
Follow these step-by-step process and you’ll be surprised how much more clearly you start to see the human body.
Use drawing as a learning tool, not just a skill.
