

No list of Ethiopian food recipes is complete without Injera, the spongy, tangy flatbread that serves as your plate and utensil. Traditionally, it requires a three-day fermentation, but we’ve cracked the code on a Quick Injera Recipe that delivers the perfect texture and tang, making it accessible for any home cook.
You want the authentic experience: the unique taste that perfectly complements rich stews like misir wat habesha gomen, but you do not have several days to wait for wild yeast to ferment. The traditional method for making Injera is a slow sourdough process, relying on nothing but teff flour and water over three to five days, a commitment that can feel daunting to anyone trying this for the first time.
This guide is your beginner’s guide to injera, detailing a streamlined, easy injera recipe that uses smart shortcuts to achieve the desirable texture and flavor in less than an hour, making it the best quick injera recipe for busy kitchens.
The Traditional Challenge and The Modern Solution
The defining characteristics of authentic Injera are its unique texture and its distinct, appealingly sour taste. In Ethiopia and Eritrea, this flavor is developed through a long, natural fermentation process where the bacteria and wild yeast present in the teff flour produce lactic and acetic acids. This process is highly sensitive to environmental factors like temperature and humidity, which makes achieving consistent results a considerable challenge, even for experienced cooks.
The modern, fast-track flatbread solution bypasses this time commitment by using leavening agents and acidic ingredients to simulate the desired effects quickly. Instead of relying on nature’s slow process, this quick injera recipe uses commercial yeast or baking soda, often combined with an acidic dairy product or sparkling water, to create the necessary lift and tang immediately. This approach allows you to achieve the spongy texture and the essential “eyes” in minutes rather than days, making this injera recipe for beginners incredibly reliable and fast.
Essential Ingredients For Your Injera Recipe With Teff Flour
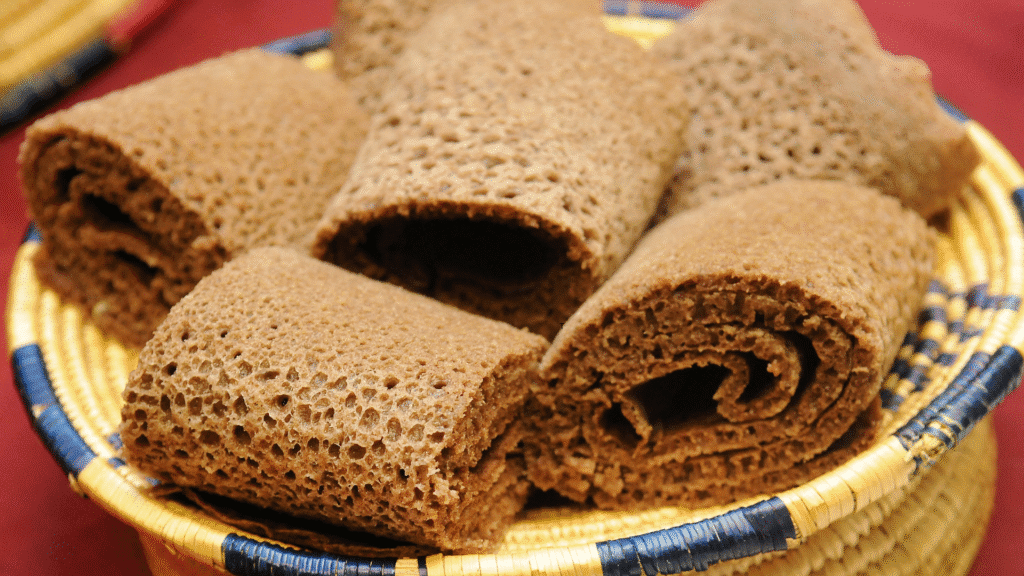
While purists use only teff and water, the most successful quick injera recipes leverage a combination of ingredients to guarantee a perfect outcome in a minimal timeframe. Selecting the right combination is key to achieving the correct consistency and flavor profile for this Ethiopian flatbread.
The Flour Base: Teff and Beyond
Teff flour is the foundation of genuine Injera and provides a nutty, earthy flavor that no substitute can truly replicate. It is also naturally gluten free and rich in iron and calcium. For a quick teff injera recipe, many successful adaptations use a mix of teff flour and another grain, such as all-purpose or whole-wheat flour. This blend can make the batter easier to handle, as 100% teff can be challenging for those new to the process.
- Teff Flour: Provides the essential flavor and nutrient profile.
- All-Purpose or Whole Wheat Flour: Helps stabilize the batter, improving structure and manageability.
If you need a strictly gluten free injera without any wheat, you can try substituting the secondary flour with oat or more buckwheat flour. Remember, the balance of flours is crucial to achieve the final, desired thin and pliable texture.
Choosing The Right Ingredients For Your Fast-Track Injera
The best quick injera recipe relies on a smart combination of ingredients to simulate the traditional sourdough process. While authentic injera uses only teff flour and water for fermentation, modern adaptations often incorporate a blend of flours, yeast, and chemical leavening agents to save time.
Flour Combinations for Spongy Texture
To simplify the process and ensure a reliably spongy outcome, many recipes for the fast-track flatbread recommend combining teff flour with other flours like all-purpose, whole wheat, or buckwheat. This blend helps stabilize the batter, as 100% teff flour can be more challenging for beginners to handle. If you’re aiming for a gluten-free injera, you can substitute the secondary flour with more buckwheat or oat flour. A good starting point is a blend of two parts teff flour to one part all-purpose flour.
Quick Fermentation Hacks
Since you are bypassing the multi-day natural ferment, you need a quick way to achieve both the tangy taste and the aeration for the famous “eyes.”
- Acid for Flavor: Traditional sourness is often mimicked using a tablespoon of apple cider vinegar or a few tablespoons of lemon juice in the batter. Another common trick is to use plain yogurt, buttermilk, or a sourdough starter if you have one readily available.
- Leavening for Bubbles: The spongy, hole-ridden texture is created using a combination of baking soda and sparkling water or club soda. The carbon dioxide in the club soda, combined with the chemical reaction from the baking soda and an acid (like yogurt or lemon juice), immediately creates the bubbles needed to form the “eyes”. Chef Marcus Samuelsson, for example, utilizes both yogurt and club soda in his recipe modification to achieve a sour and aerated batter quickly.
Step-by-Step Instructions for Quick Injera Success
Creating this perfect injera is simpler than you might think, requiring minimal resting time and a focused cooking technique. The total preparation time can be as little as 35 to 45 minutes.
The Batter: Whisk, Rest, and Ready
Start by combining your dry ingredients—typically teff flour, a secondary flour, a leavening agent like baking powder or baking soda, and salt—in a large bowl. In a separate bowl, whisk together your liquid ingredients, which will include water, an acidifier like lemon juice or yogurt, and the club soda. Whisk the wet mixture into the dry ingredients until you have a smooth, thin batter, slightly thicker than crepe batter.
The rest is minimal, but essential. Allow the batter to rest for 15 to 20 minutes. This short pause allows the flours to hydrate fully and the chemical leavening agents to begin their work. Straining the batter through a sieve after mixing is a key tip, as it removes any remaining lumps for a silky smooth, pourable consistency.
The Cooking: Achieving The ‘Eyes’
The key to the spongy Ethiopian flatbread is the cooking technique, which is more akin to a crepe than a pancake, but with a unique steaming step to ensure the top surface is cooked through.
- Prep the Surface: You’ll need a large non-stick skillet or crepe pan, preferably with a lid. Heat the pan over medium-high heat until a drop of water quickly sizzles and evaporates. You may lightly grease the pan with clarified butter (niter kibbeh) or a neutral oil, although a good non-stick pan may not need it.
- The Pour and Swirl: Pour about 1/2 cup of the thin batter into the hot pan, starting at the center and working in a circular, spiral motion to coat the bottom evenly with a thin layer. The amount of batter will depend on the size of your pan.
- The Steam: Cook the injera uncovered for about 20 seconds. You should immediately see hundreds of tiny holes—the coveted “eyes”—forming across the surface as the CO2 bubbles escape. Once the edges begin to lift and curl, or the holes are visible but the surface is still wet, quickly cover the pan with a lid and reduce the heat to low. Let it steam for an additional 30 seconds to 2 minutes until the top is set, no longer shiny, and feels firm to the touch. Unlike a pancake, quick injera is generally not flipped.
Transfer the finished injera to a cooling rack or clean cloth to cool completely, as stacking warm injera will cause it to stick together.
Serving and Pairing Your Homemade Injera
Now that you’ve mastered this quick and easy injera recipe, it’s time to serve it as the foundation of a traditional Ethiopian spread. Injera is meant to be eaten communally and is the edible plate for richly spiced stews called wats.
One piece of injera is often used as a large plate upon which various stews are piled, while the remaining pieces are rolled up to be used as ‘spoons’. The tangy, slightly sour flavor of the injera is the perfect counterpoint to the deep, complex heat and spices of the wats.
Popular Pairings to Serve with Injera:
- Misir Wat: A spicy, flavorful red lentil stew, often seasoned with berbere and a mixture of turmeric, paprika, and cardamom.
- Doro Wat: A rich chicken and egg stew, traditionally made with a lot of slow-cooked onion and niter kibbeh (spiced clarified butter).
- Ye’abesha Gomen (Habesha Gomen): Ethiopian collard greens or slow-cooked kale seasoned with ginger, garlic, and sometimes mild berbere.
- Alicha/Tikil Gomen: A milder, yellow stew of cabbage, potatoes, and carrots, which balances the spicier dishes.
- Kik Wot Recipe (Yellow Split Pea Stew): A non-spicy stew made with yellow split peas and seasoned primarily with turmeric and garlic, offering a gentle, earthy counterpoint to the Misir Wat.
Wrapping Up
This guide has demystified the process of making injera at home, transforming a once multi-day endeavor into an easy injera recipe achievable in an evening.
By understanding the core principles of fermentation: creating acid and aeration and employing clever, fast-acting leavening agents like those used by Marcus Samuelsson, you can achieve the complex flavor and spongy texture of traditional Ethiopian Injera with consistency and speed.